One of the many elements of Windows Phone that I like about the platform is the ability to personalize your Start screen experience. Live Tiles are a big part of that and many apps take advantage of this feature that has been a part of the platform since Windows Phone 8 was released. One of those features is the ability to set a photo as your Photos Live Tile in Windows Phone 8.1. The ability to do this has actually been around since the Windows Phone 7 and I actually posted a How To way back in November 2011 on how to do it then. Today it is a bit easier and more intuitive but it is buried in Settings. In this How To I’ll show you where it is located and how to set up your favorite photo as Live Tile.
First, go to Settings on your Windows Phone and then swipe to the right to get to the Applications page. Scroll down to the Photos+Camera menu then tap it to open. On this menu you will see a lot
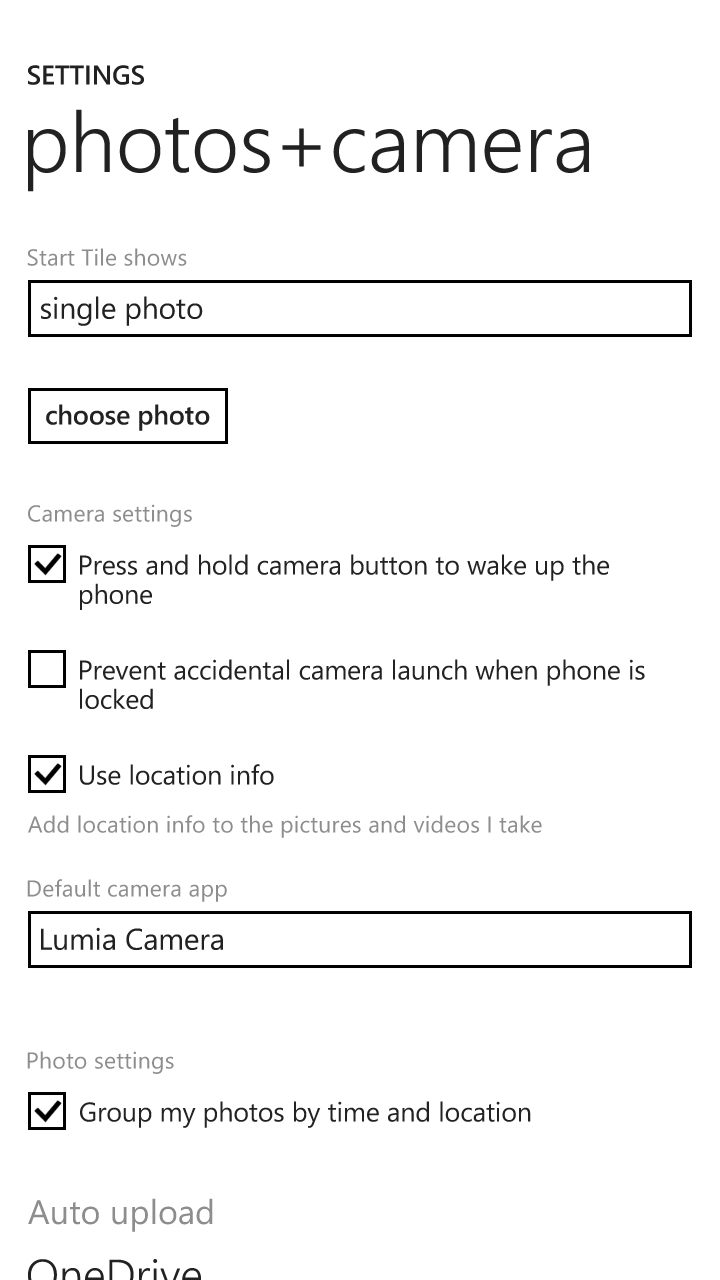
Setting a Photo for Your Photos Live Tile on Windows Phone 8.1
of different options for how your camera performs, which camera app you want to use as default and so forth. At the top you have a pull down menu titled Start Tile Shows. You have three options: Show all photos which will rotate the Photos Live Tile with all of the photos on your device. The second option is to do the same but only with those photos you have marked as favorites. The third, the one we are interested in for this How To, is a single photo. Make sure it is set to this then tap the Choose Photo button just below the menu.
You should now be in your photos on your Windows Phone where you can scroll up and down to find photos that are on your phone. You can also swipe to the right and see any albums of photos you have created as well as access photos that you have in your Facebook, OneDrive or Twitter photos. The key here is that you don’t necessarily just have to select a photo that’s on your phone so long as you have connectivity to these other services. Once you find the photo you want to set as your Photos Live Tile, tap it and it will have a check mark overlaid on it and automatically take you back to the Photos+Camera settings menu. Tap the Windows Key on your phone and you should

My Photos Live Tile Photo
now see the photo you selected as your Photos Live Tile. Depending on your phone’s speed it make take a minute or two for it to show up but eventually it will rotate to the photo you selected.
For more How To’s for Windows and Windows Phone, be sure to check out my How To pages for each of the platforms. If you have a tip or trick that you want to share, use the Contact page and let me know so I can give you full credit for it.
By-the-way, for those who are curious, it looks like this feature will change in Windows 10 for Phone based on the Preview at this point. The settings for this are in the new Photos universal app that is part of the Preview but you can only select recent photos at this time in the Preview. Given how much of the Photos app is under construction in the Preview, I expect this will morph a bit but I’ll keep you posted.
No Responses