Keep track of the amount of data you consume on your mobile plan is something that the majority of us have to do. While there are some unlimited data plans that meet the need for power users, the rest of us usually have a limited amount each month or top up of our mobile accounts. To aid in this, there are several apps out in the Google Play Store to help you get a reasonable grasp of the amount of data you are using for a specific period of time. My personal favorite has been My Data Manager as I’ve been using it on Android and iOS and it is reasonably good at tracking not only your mobile data usage but your Wi-Fi usage at the same time.
With the release of Android Lollipop, Google added a data manager into the platform directly. Designed to give you information on your cellular usage as well as Wi-Fi, the Data usage feature in Android Marshmallow is nearly identical to that which we found in Lollipop. In this How To I will show you where to find this on your Android Phone and how to configure it to set thresholds so you will know if you are approaching your data allotment for your billing period.
First, it should be said that none of the data usage apps are 100% accurate although I think that the one we find in Android Marshmallow is probably the closest. Just be aware that you could see a
Data Usage in Android Marshallow
discrepancy between what your carrier sees and what the app sees. Second, if you are using Project Fi for your carrier, you may find that using the Project Fi app is a better alternative as it essentially provides you the same information within that app as this setting does in Marshmallow.
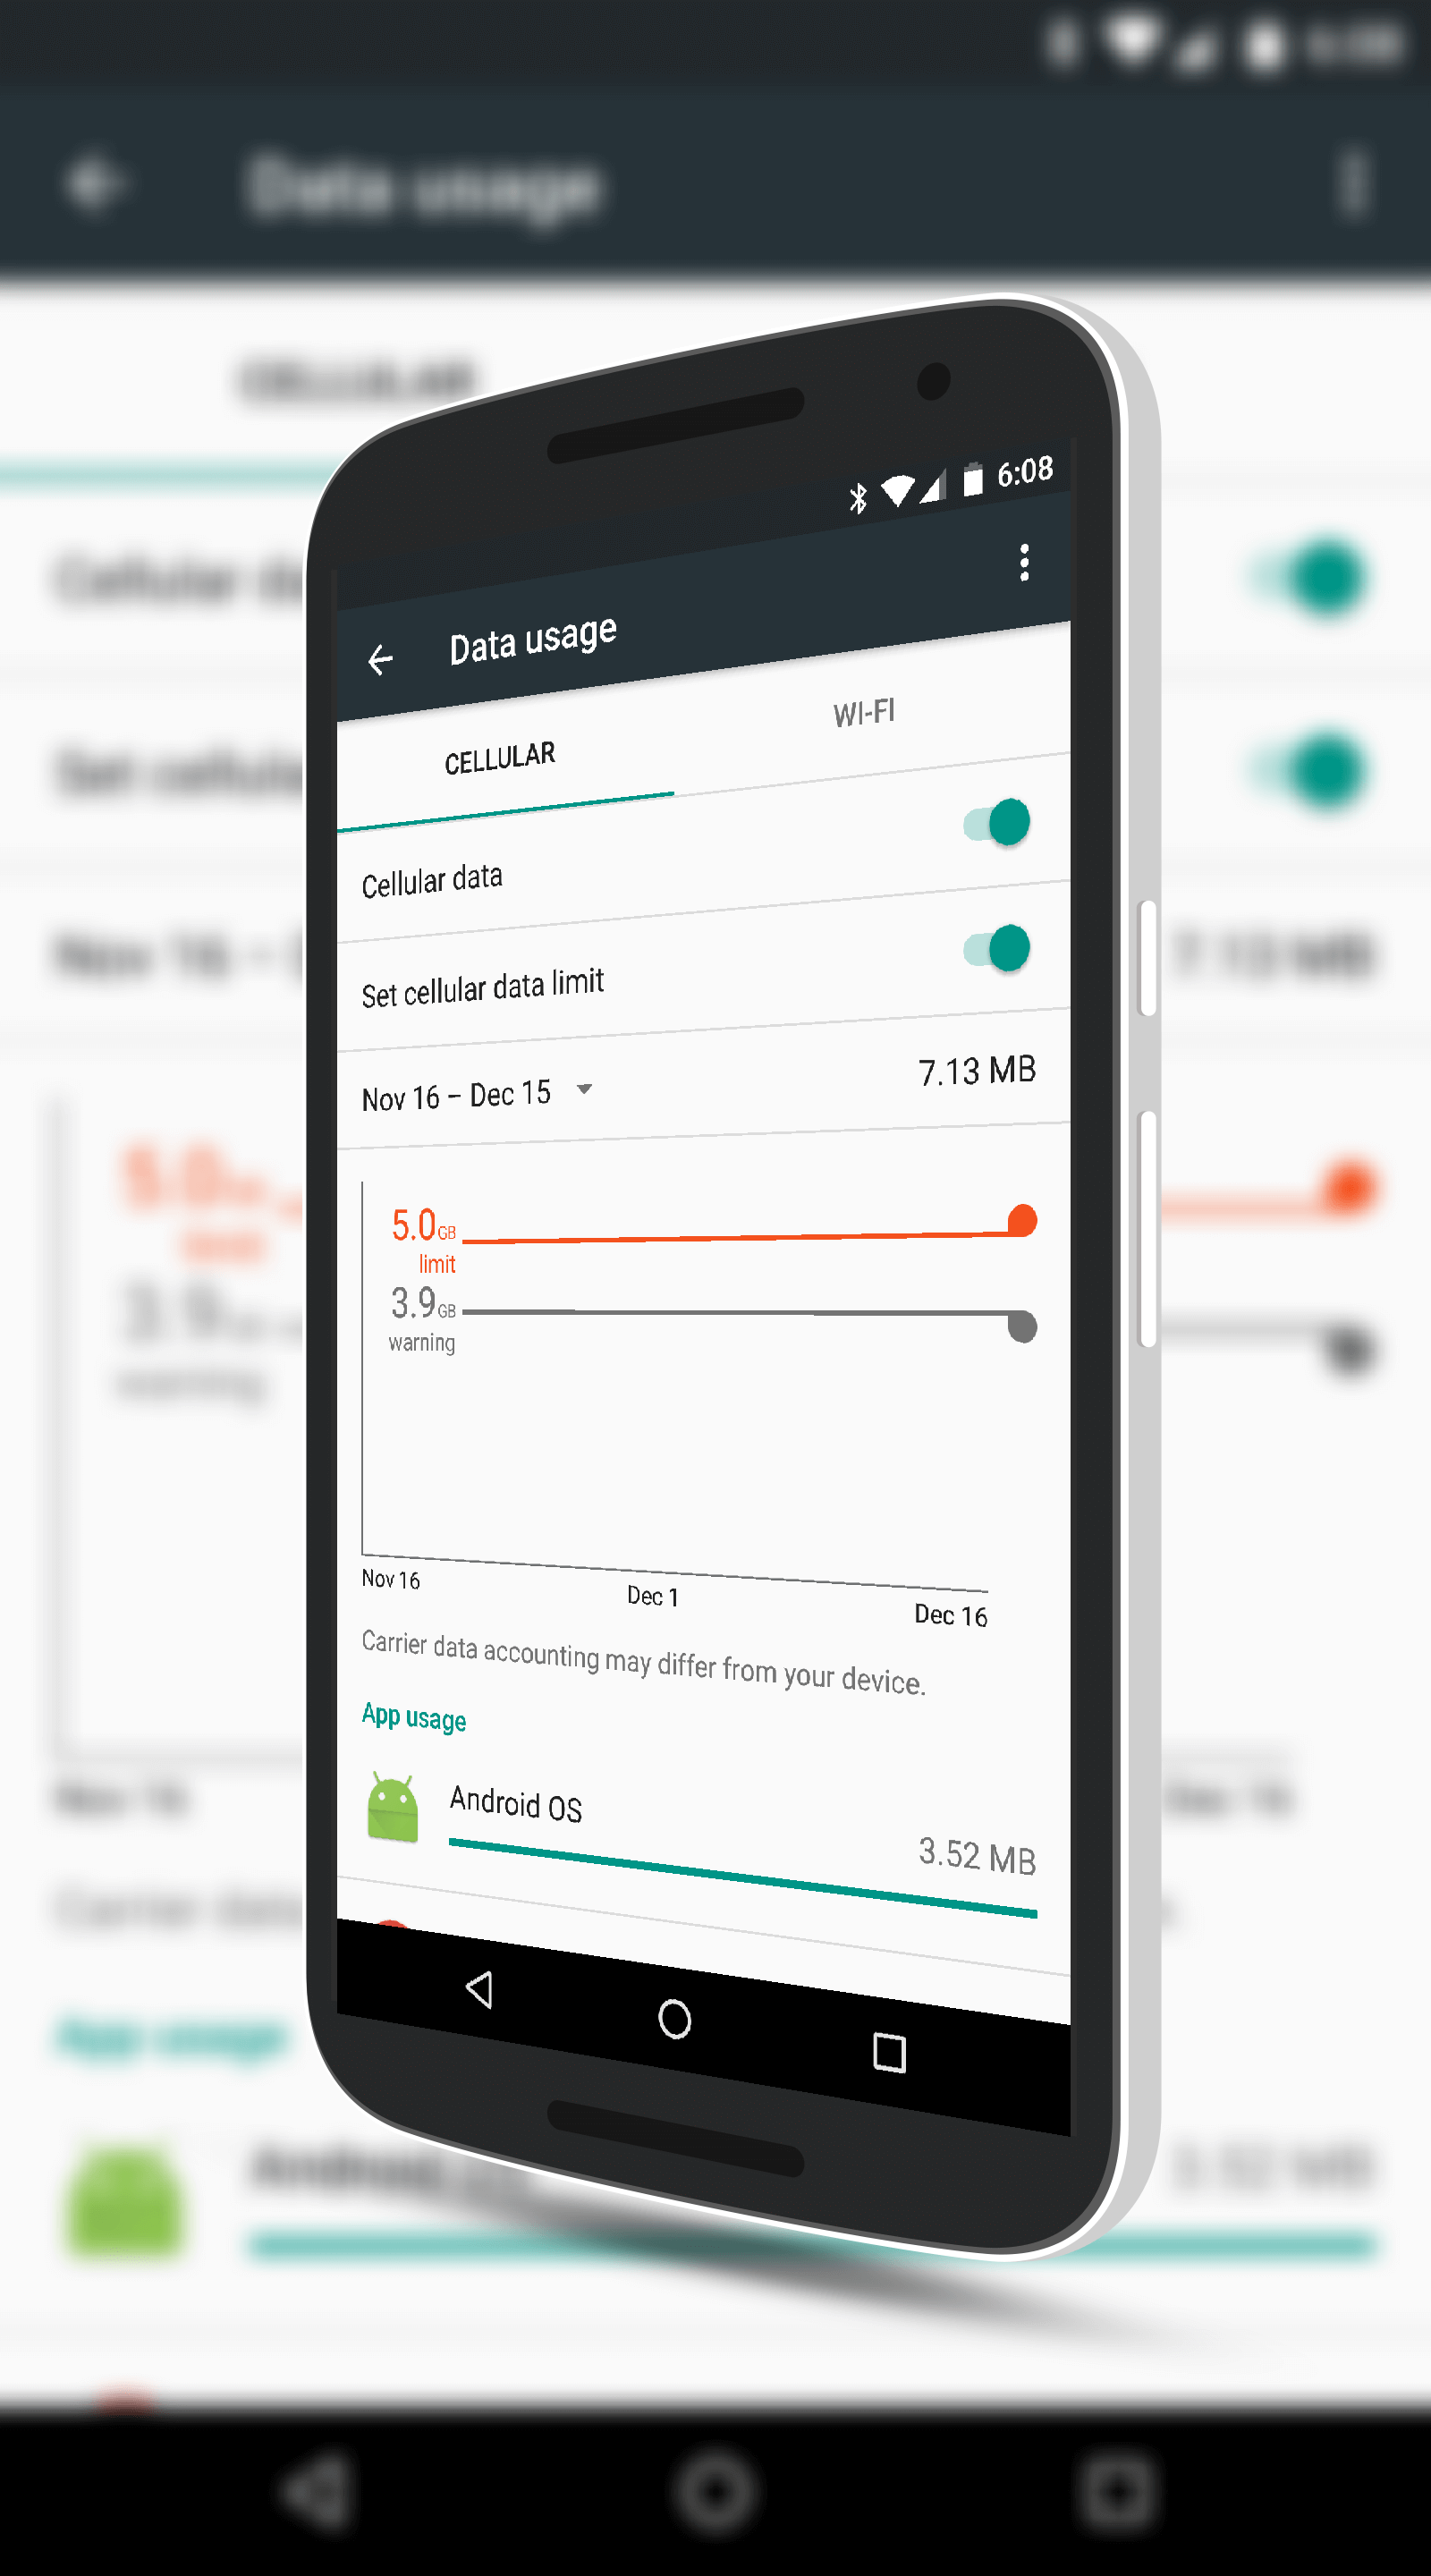
To get to data usage on your device running Android Lollipop or Android Marshmallow, got to Settings and then Data usage. You will your data usage for your current billing period which you can adjust by tapping on the date then tapping Change Cycle…. Also, you will just how much data you have used this month next to the date.
Below the billing cycle you will see a chart which reflects your data usage for the current month and when you get a warning about the amount of data you have used. To change this warning threshold, just tap the warning number (the one in grey) and you will get a rotary display popped up where you can dial your way to a particular number. Likewise you can just tap on the number and it will pop up the number keypad so you can put in a number easily (rotating up to say 8GB can take a LONG time – type it instead). Remember that this is in Megabytes so 1,000MB is equal to 1GB. Once you have the number you want your warning set to, tap Set and your new warning number will be displayed.
If you want to set a limit, you can also do that within the data usage settings in Android Marshmallow. At the top of the display there is a slider button to Set cellular data limit. Turn that on and you will see a secondary number pop up on the chart below in orange. Like the warning threshold, tap on the limit number to adjust it. So how does this work? When you reach your limit (say 5GB), your phone will turn off the data function so you avoid overages. It’s dead simple but effective.
If you are curious as to which apps are consuming the most data, those are listed below the chart showing your usage. Just scroll down and you can see which apps have consumed the most data for the billing cycle.
Finally, you will note on my screenshot that I have two tabs: Celluar and Wi-Fi. By default the Wi-Fi tab is turned off (this is the case in both Android Lollipop and Android Marshmallow). To enable this tap, go to the menu in the upper right corner then select Show Wi-Fi. Now you will have two tabs, one for your mobile data and one for your Wi-Fi.
This feature in Android Marshmallow is nice to have and it certainly will help you keep track of your data usage without having to install a 3rd party app. Best of all, it’s built in and free.
For more How To’s on Android, Chromebook, Chrome OS, Windows, and Windows Phone, be sure to check out my How To & Tips pages.