One of the great features of a Chromebook is the ability to save a site you regularly visit to your Shelf for quick access. It is a feature that is exclusive to Chrome OS and not something you can do on the Chrome browser for Windows or MacOS – at least not yet.
If you are new to Chrome OS and a Chromebook, adding a site to your Shelf is very easy to do and in this How To, I’ll show you were to find the somewhat buried menu to do so.
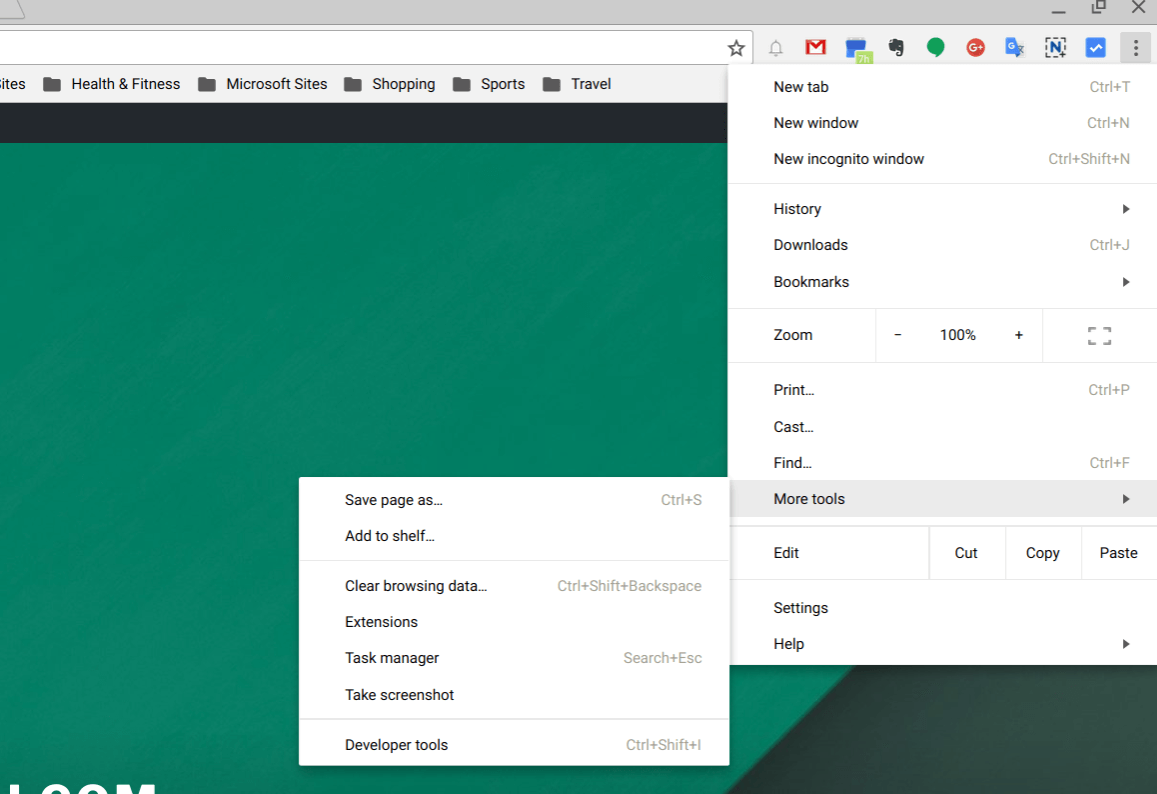
First, navigate to the site that you want to add to your Shelf in the browser. Now go to the overflow menu (the three vertical dots) and go down to More Tools. There you will see the second menu option, Add to shelf.
Once selected, you can rename the site you are pinning to the Shelf and when you tap Add, it will be added to the row of icons on your Shelf. Now you can click on that icon and it will bring up that site for you in just one click.
Adding a Site to the Shelf on Your Chromebook
The only limitation in adding these sites to your Shelf is the limitation of space on the Shelf itself. Also, you cannot change the icon of the site so if you are adding a not-so-common site, you may get a generic icon for it on your Shelf.
If, after a time, you decide you want to delete the pinned site on your Shelf, you can easily delete it too. Just go to that icon and right-click it (or two-finger tap it) and then select unpin.
For More How To’s, be sure to check out the Tips & Tricks section of the site.