One of the challenges of Chrome OS is when it comes to partitioned USB drives. Let me paint the scenario for you. Let’s say you have a 64GB USB drive that you were using as your Chrome OS Recovery drive for your Chromebook (I highly recommend you create one if you haven’t already). Now let’s say that you pick up a small 16GB drive for a few bucks and decide you want to have that as your recovery drive instead as it is a more efficient use of the drive space. After all, a Chrome OS recovery drive only needs about 4GB of storage.
You create your new recovery drive and put it in a safe place. Now you plug in your old recovery drive and open it up in the Files app. There you will see the USB drive has two partitions: OEM and USB Drive.
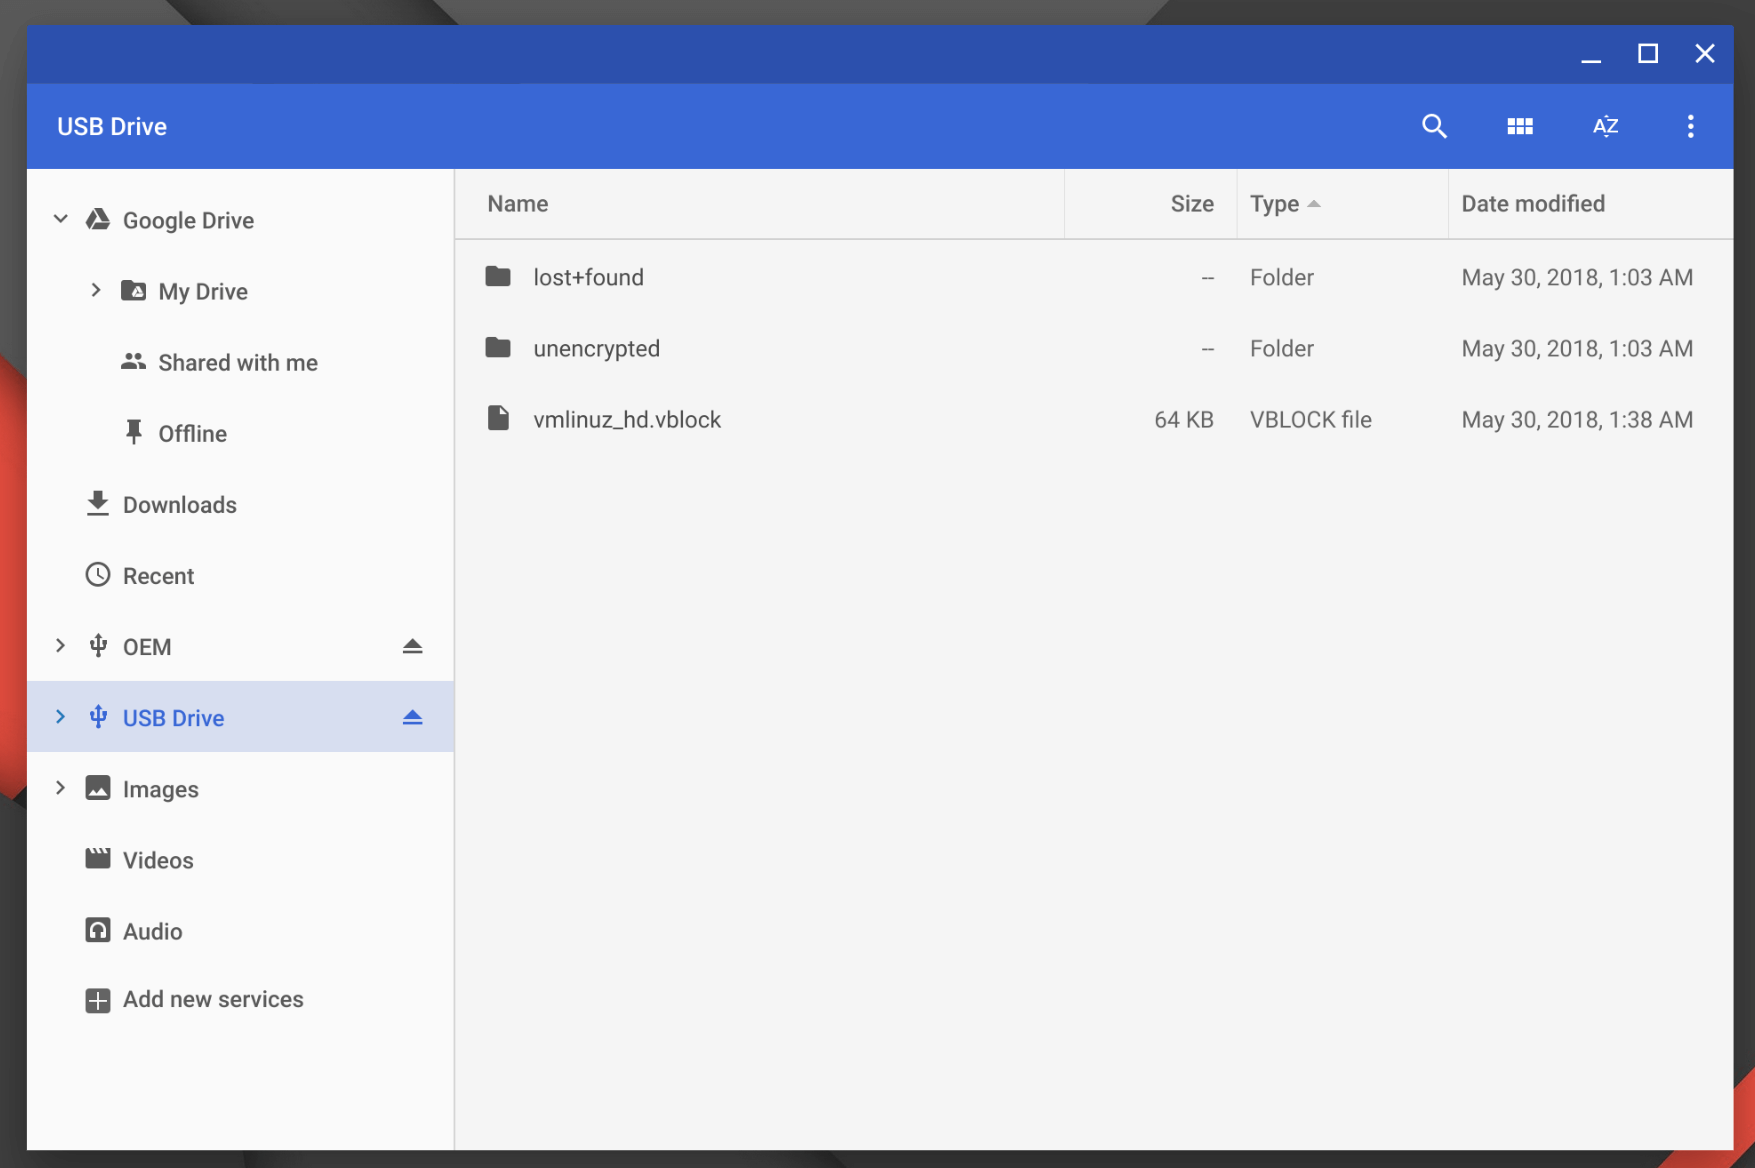
Partitioned USB Drive in Chrome OS Files App
The problem is that if you reformat the USB Drive partition or the OEM partition, you will still have a partitioned drive. In other words, just like in Windows or MacOS, reformatting doesn’t get rid of a partition. You have to completely wipe the drive of data and partitions to get it back to one partition.
Fortunately, within Chrome OS, there is a quick and easy way to do this using the Chrome OS Recovery app itself. In this How To, I will walk you through the quick process to take that multi-partition USB drive and reset it to one partition that is the size of the USB drive itself.
First, get your old USB drive that is partitioned either from Windows, MacOS or the Chrome OS Recovery app and insert it into your Chromebook. Now open up the Recovery app. In the upper-right corner there is a gear icon which you can open. The first option, Erase recovery media, is the feature we want to access in this How To. Click on it and it will walk you through the process of erasing the USB drive, partitions and all.
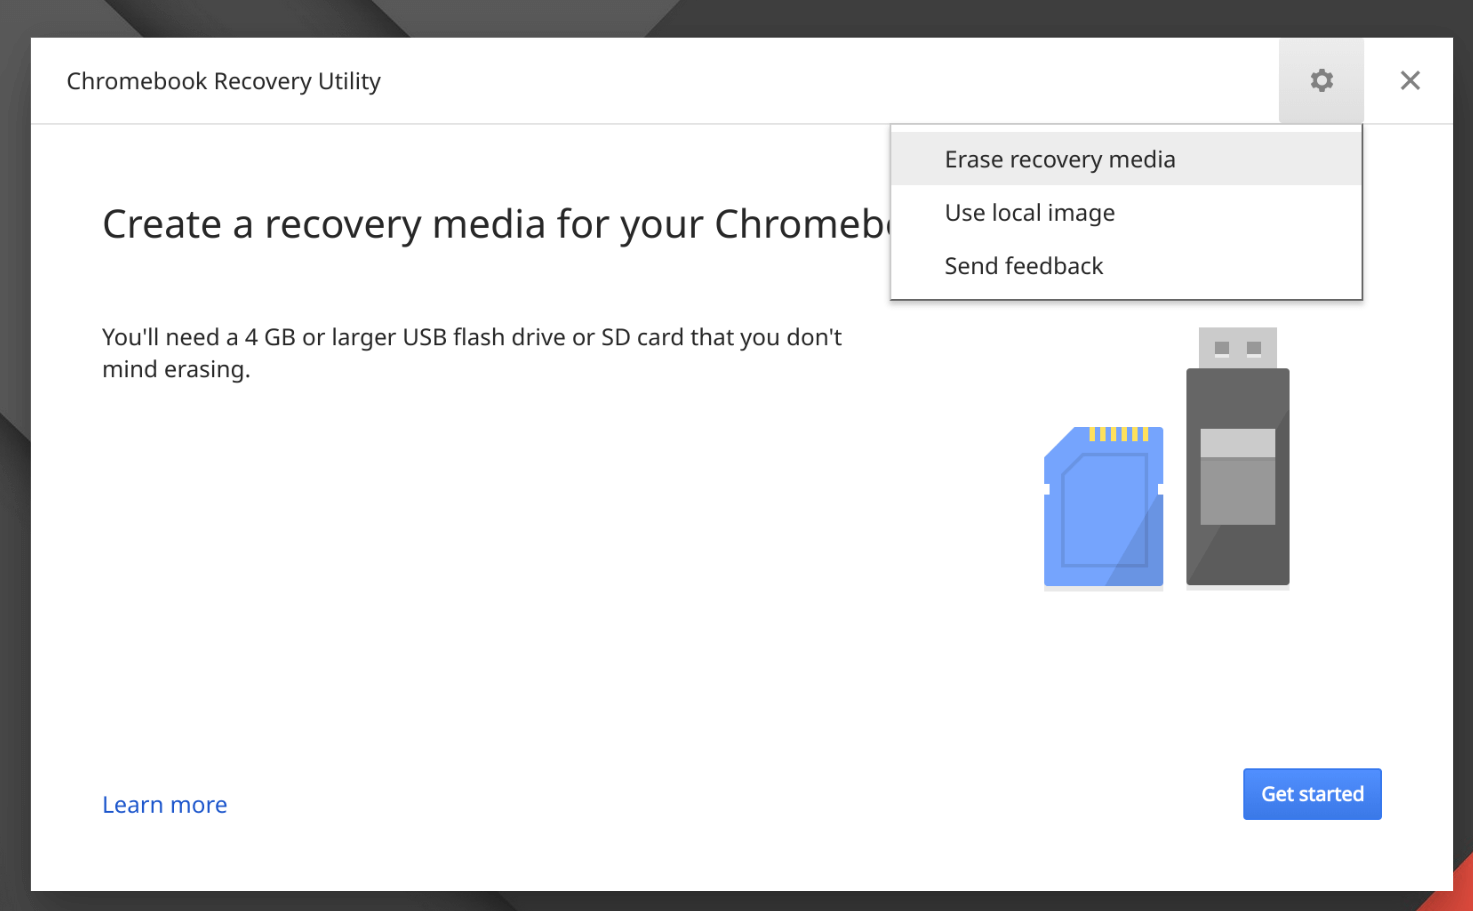
Chrome OS Recovery to Format a USB Drive
It should go without saying but… make sure you have any data on the USB drive backed up to your Chromebook prior to erasing it. Once you erase the drive, it will be really, really gone.
With the drive now completely erased, it has no partition on it nor does it have any data. What that means is, if you open up the Files app, you won’t even see the drive. You have to unplug it from your Chromebook then reinsert it and then it will show up in Files.
Now that you see the USB drive in the Files app, click on it and you will get a warning that you need to format the drive. Remember, the erasing step above completely cleared everything off the drive so Chrome OS sees it as a storage device but not ready to be used yet.
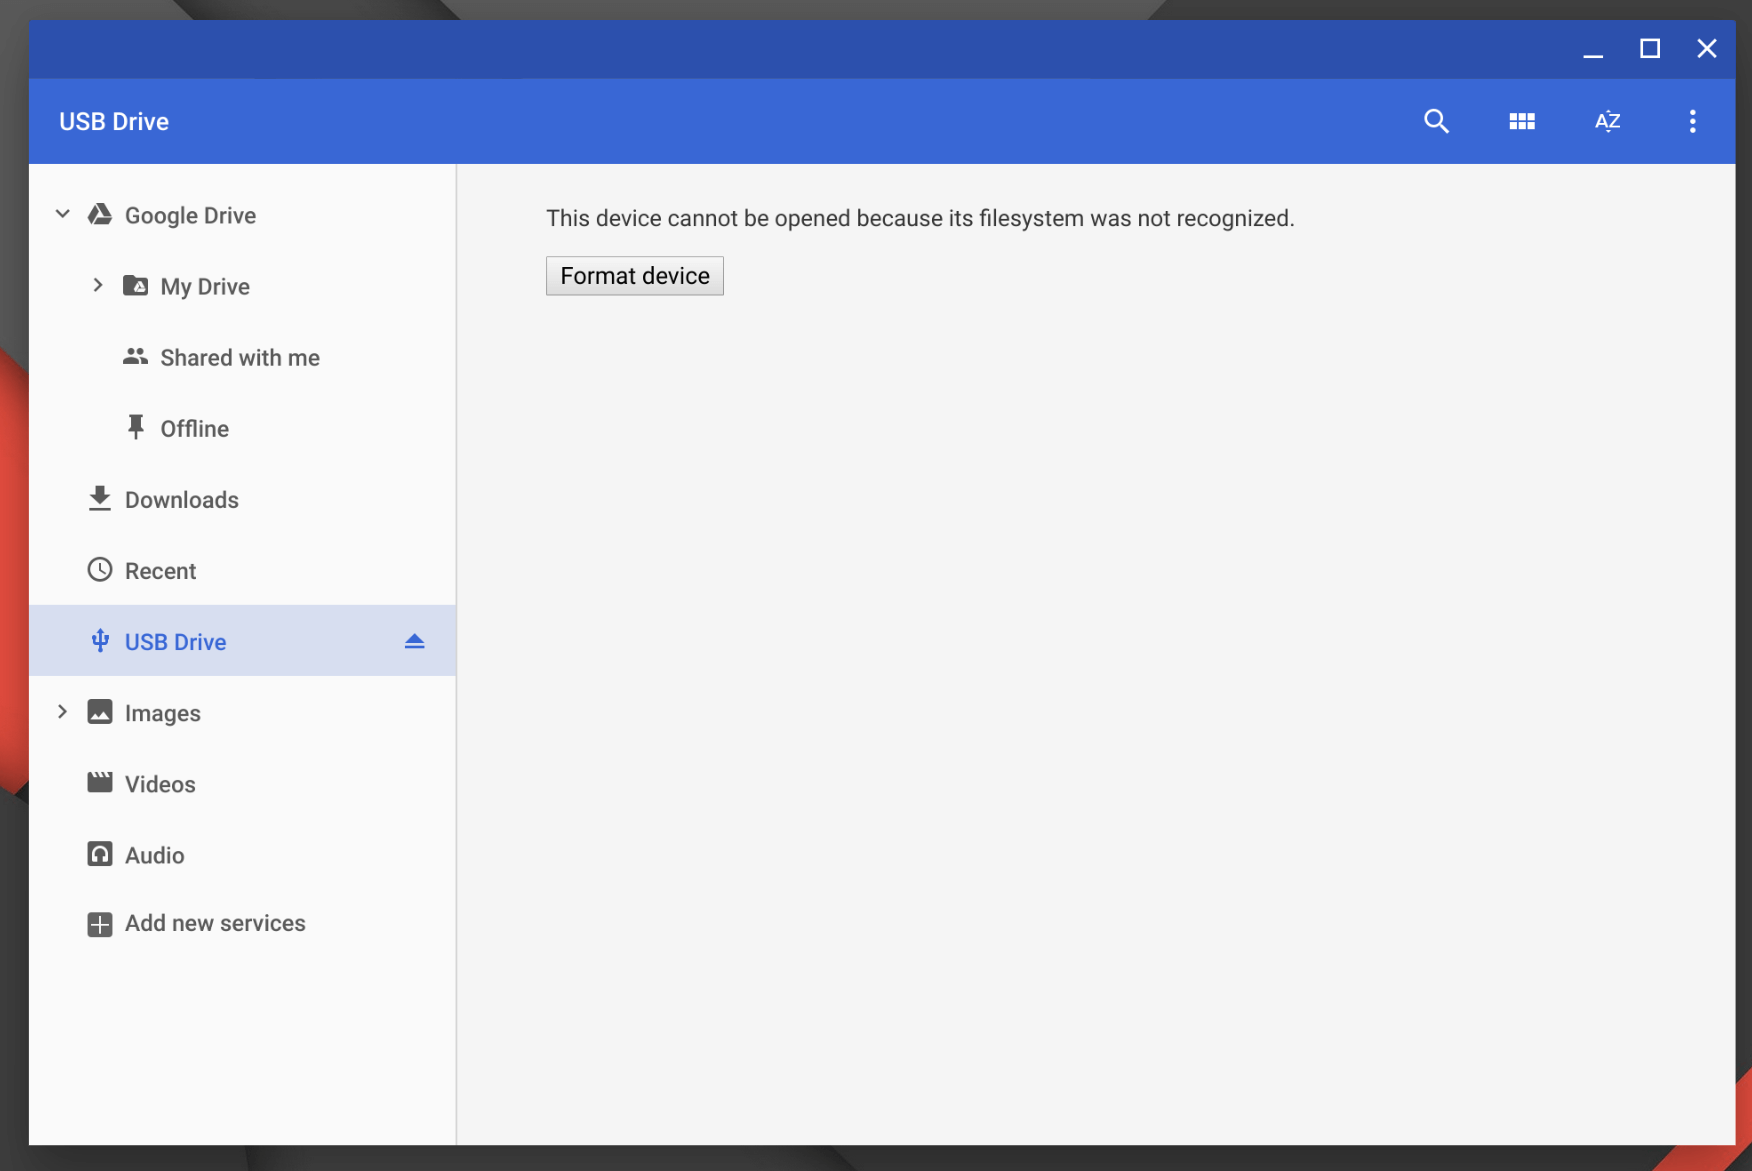
USB Drive Needs Formatting in Chrome OS Files App
Click the Format device button and Chrome OS will reformat the USB drive with a single partition that can be used by the platform.
That’s it! Now you have recovered your USB drive with multiple partitions and got everything back to one partition and reformatted so your Chromebook can use it.
For more How To’s, be sure to check out the Tips & Tricks section of the site.
No Responses