For most people, user profiles in Android is a rarely thought of or configured feature of the platform. To be fair, in Android Lollipop and Android Marshmallow, outside of a work environment configuration, profiles did not have a lot of bang or, frankly, use. That changes for the better in Android Nougat. Like many features in this evolution of Android, the team at Google took something already in the Operating System and improved it. In this case, significantly.
For those who aren’t familiar, User profiles allow you to have different users use the same device. Let say you want to have a profile for the kids and one for yourself that has different apps installed. It is a pretty cool feature but just not something most people need.
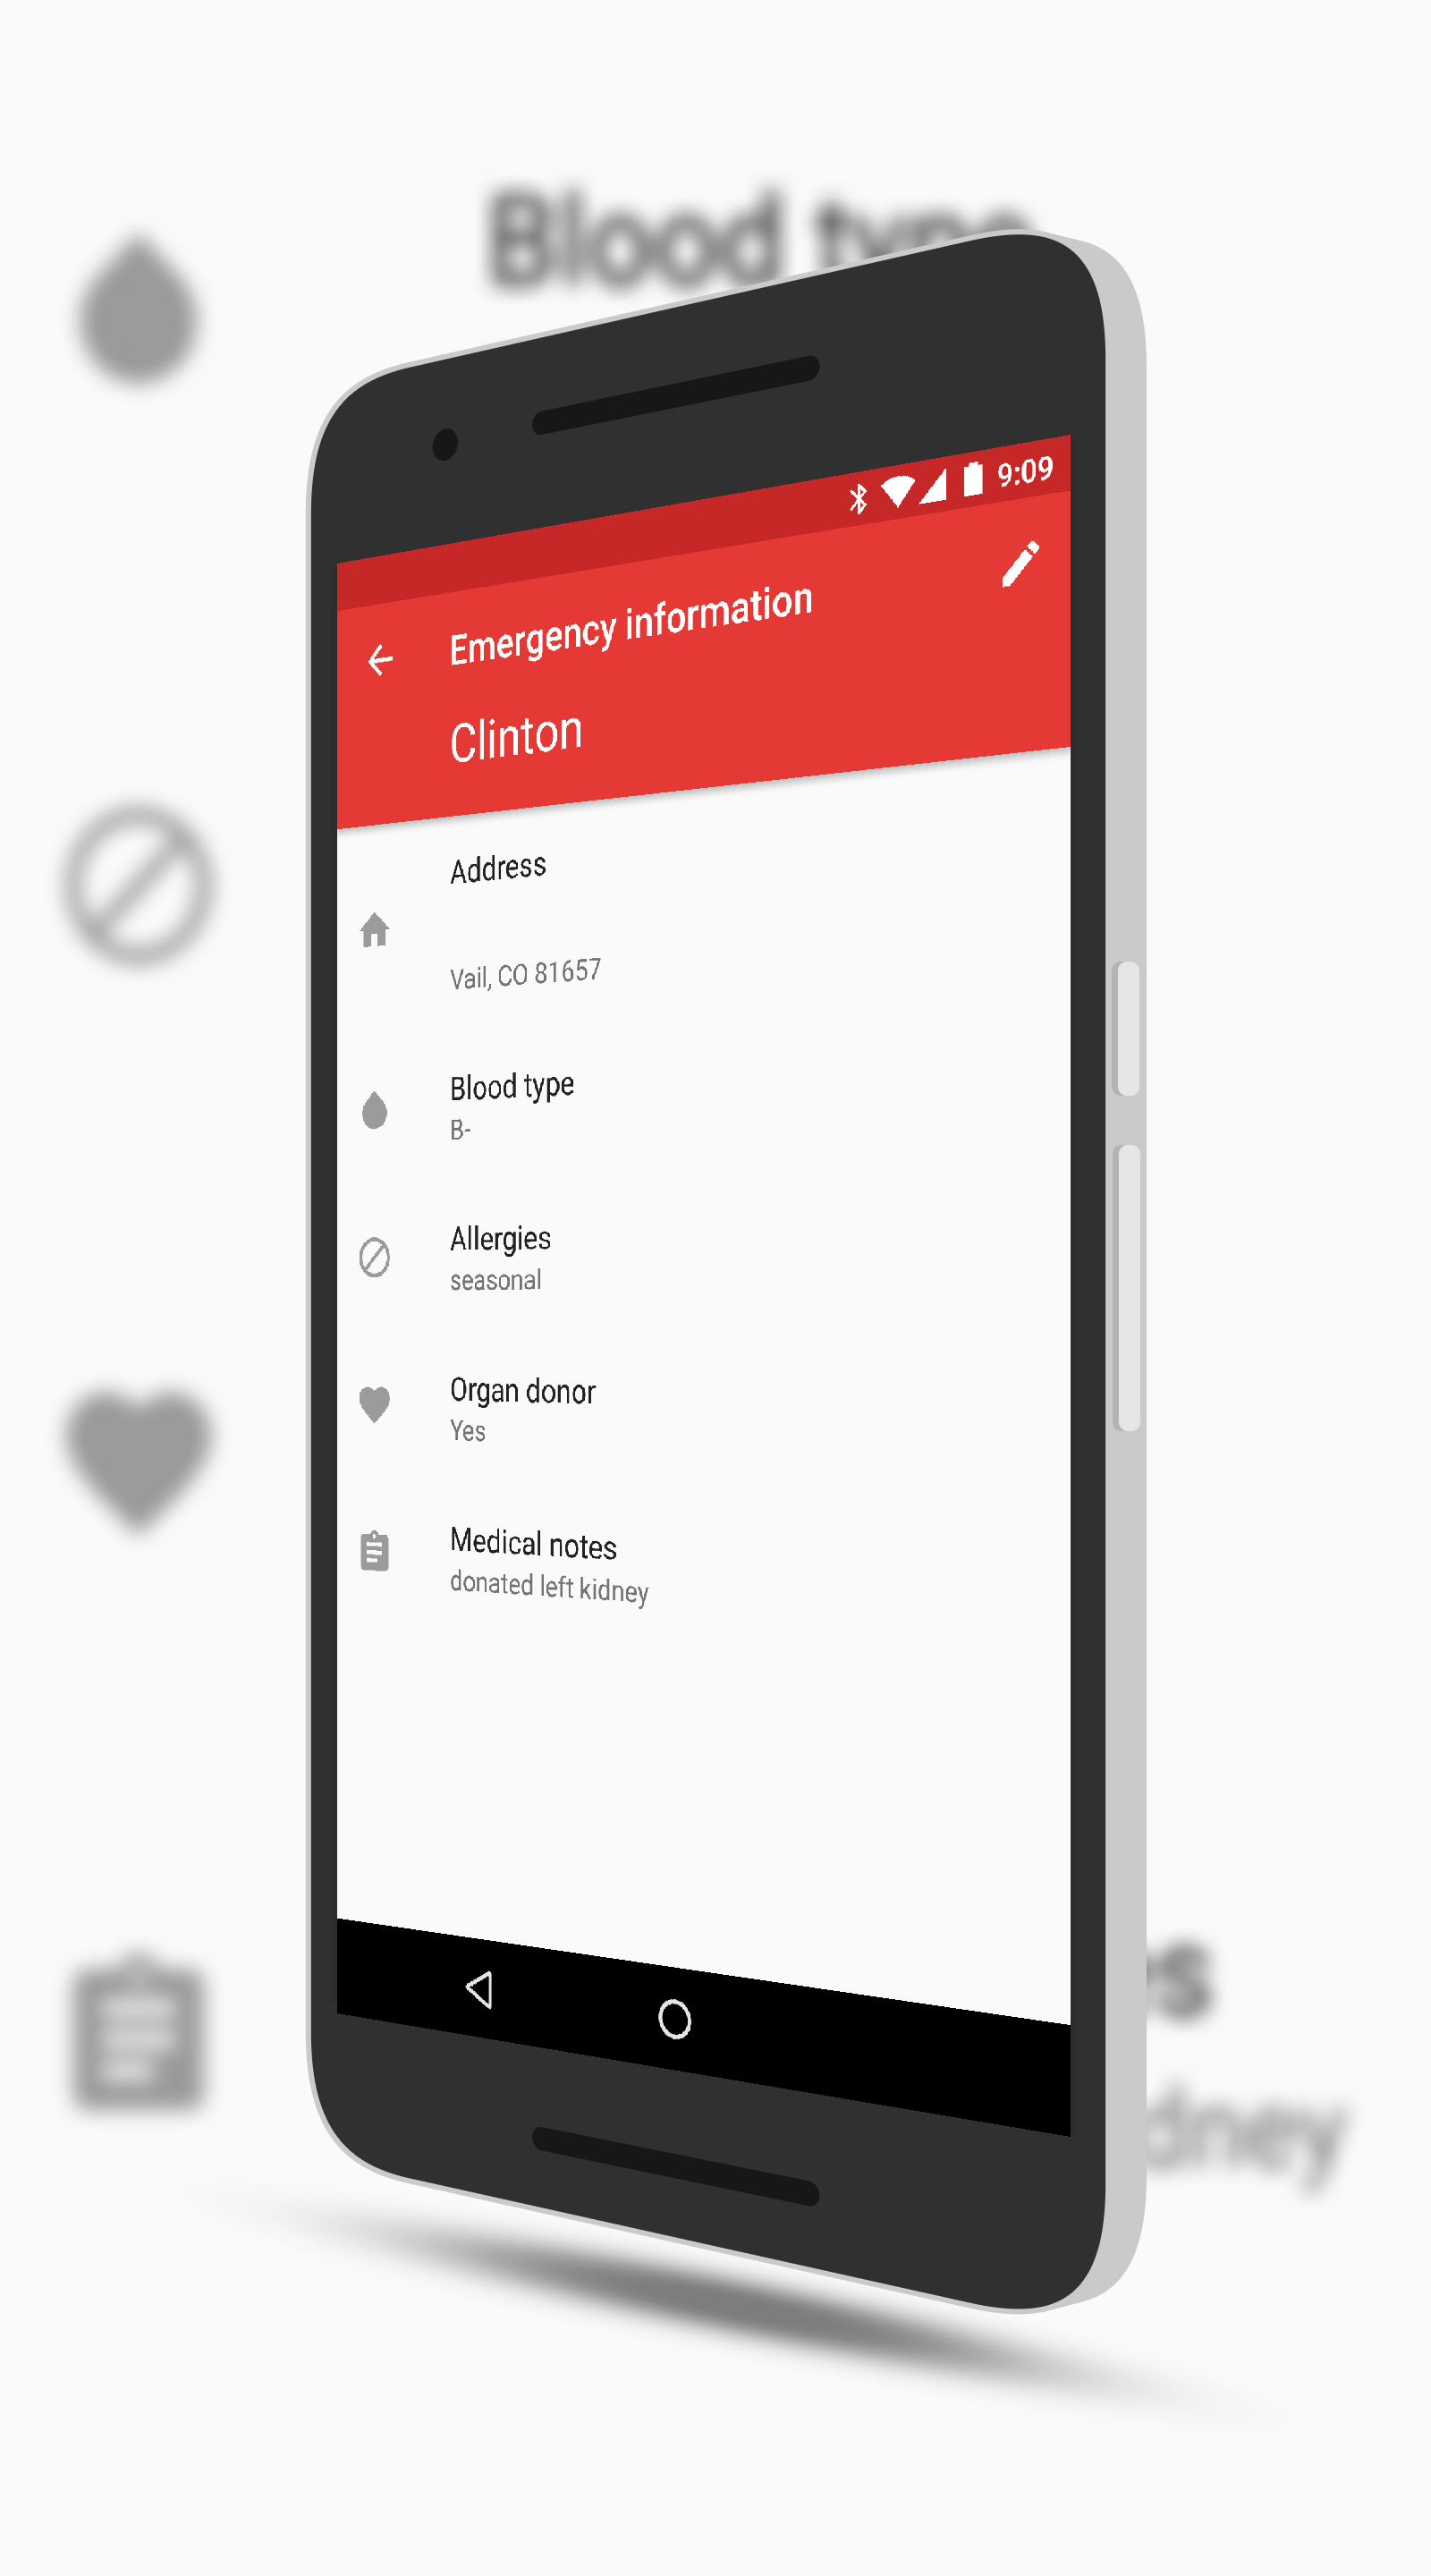
In Nougat however there is a good reason to go and fill out the Owner user profile for your phone or tablet. You can now add emergency information to your profile and that information can be accessed through the emergency dialer on the phone should you be incapacitated. In this How To, I’ll show you where to access this information, how to fill out the details and how to access it in an emergency. It could make a big difference for first responders should you be unresponsive.
To access this emergency information, slide the Notification Shade down and tap on the profile icon (it is next to the Settings gear icon). Once open, tap on More Settings where you can see all of
Emergency Information in Android Nougat
the profiles on your phone. By default there is one, the Owner, which is you. At the bottom of the list you will see a new Emergency Information option. Tap that and fill out the information such as your name, age, address, blood type, known allergies, etc. You can also associate a contact for someone to call which again, can be accessed from the Emergency dialer. Ultimately you want to complete as much information as possible on both the emergency information page and the contact page. If, for example, you have any allergies to medications, you should list them so first responders do not give you something that could be harmful. Likewise, ideally you should have two contacts for responders to reach out to in case one is not available.
Now that it is setup, you can test this by locking your phone that has a PIN, password or pattern. Swipe up as if you were going to unlock the phone but instead. Tap on EMERGENCY at the bottom of the dialer. Next, at the top of the dialer, tap on the Emergency Information button at the top twice. This displays all of the information that you entered in for an emergency worker to access. Likewise, they can swipe over to the designated contacts and call them.
The idea of course is to give responders quick access to information about you in a situation where you could not answer them or are unable to answer them. This can save precious seconds which could make a difference in your recovery or health. It is a simple but effective change and I’m glad to see the Android add this to what has been a somewhat useless function in the platform.
For more How To’s, be sure to check out the How To pages here on the site.