One big change in Android Nougat is the ability to adjust the urgency of notification. In Android Marshmallow, you can you somewhat have a binary decision when it came to notifications. With Nougat, you have far more granular controls around notifications and, in fact, have six levels of notifications that you can set for applications. The nice thing is that you can set this for each and every app on your device should you want to go through that process.
In this How To I will show you how to access the Power Notifications Controls and how to configure them for applications.
In order to get to the Power Notification Controls, you will have to have access to the System Tuner in Nougat. Accessing System Tuner in Nougat is identical to the process in Marshmallow. Slide the notification shade all the way down on your phone then tap and hold the Setting gear icon. After a few seconds it will shake and you will see a pop-up letting you know you have accessed
Power Notification Control in Nougat
System Tuner. From there, go to Settings, scroll all the way down and just above About Phone you should see System Tuner. Tap it then tap on Other. There you will see the Power Notifications Controls. Tap that area and you can enable the feature by using the toggle switch at the top.
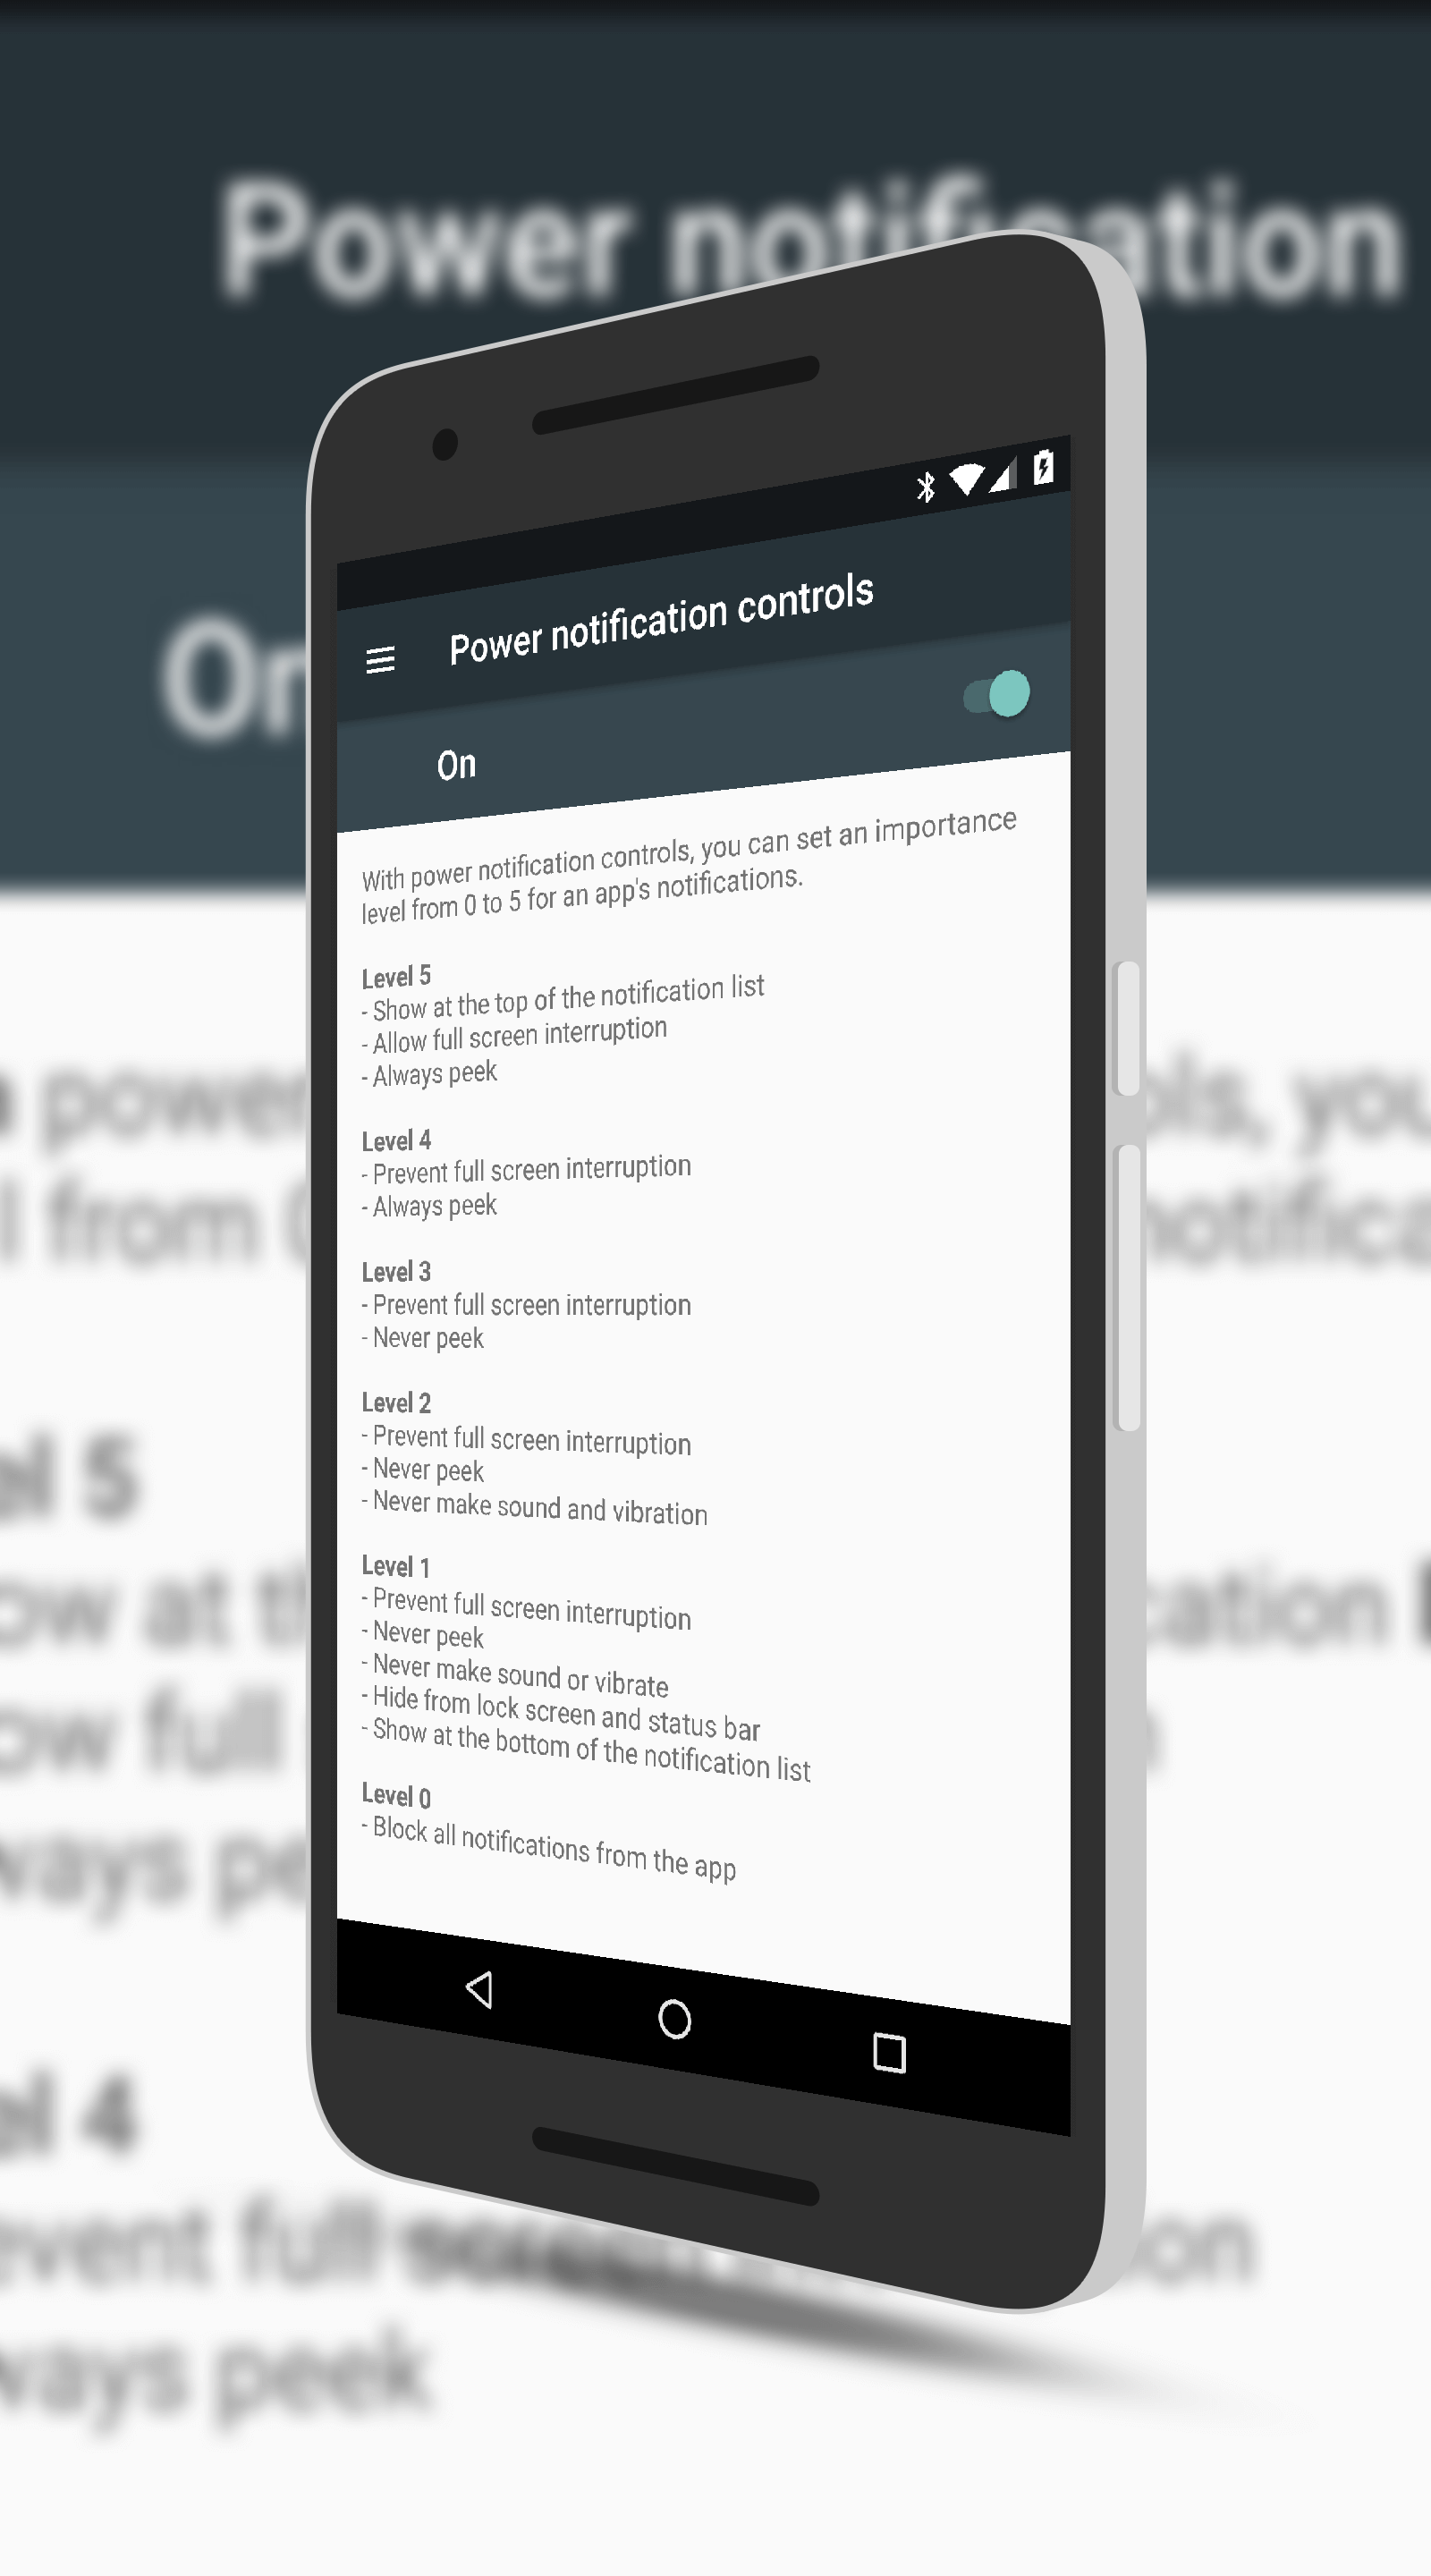
In all there are 6 different levels of notifications you can have in Nougat:
Level 0
- Block all notifications form the app
Level 1
- Prevent full screen interruption
- Never peek
- Never make sound or vibrate
- Hide from lock screen and status bar
- Show at the bottom of the notification list
Level 2
- Prevent full screen interruption
- Never peek
- Never make sound and vibration
Level 3
- Prevent full screen interruption
- Never peek
Level 4
- Prevent full screen interruption
- Always peek
Level 5
- Show at the top of the notification list
- Allow full screen interruption
- Always peek
App Notification Control Settings
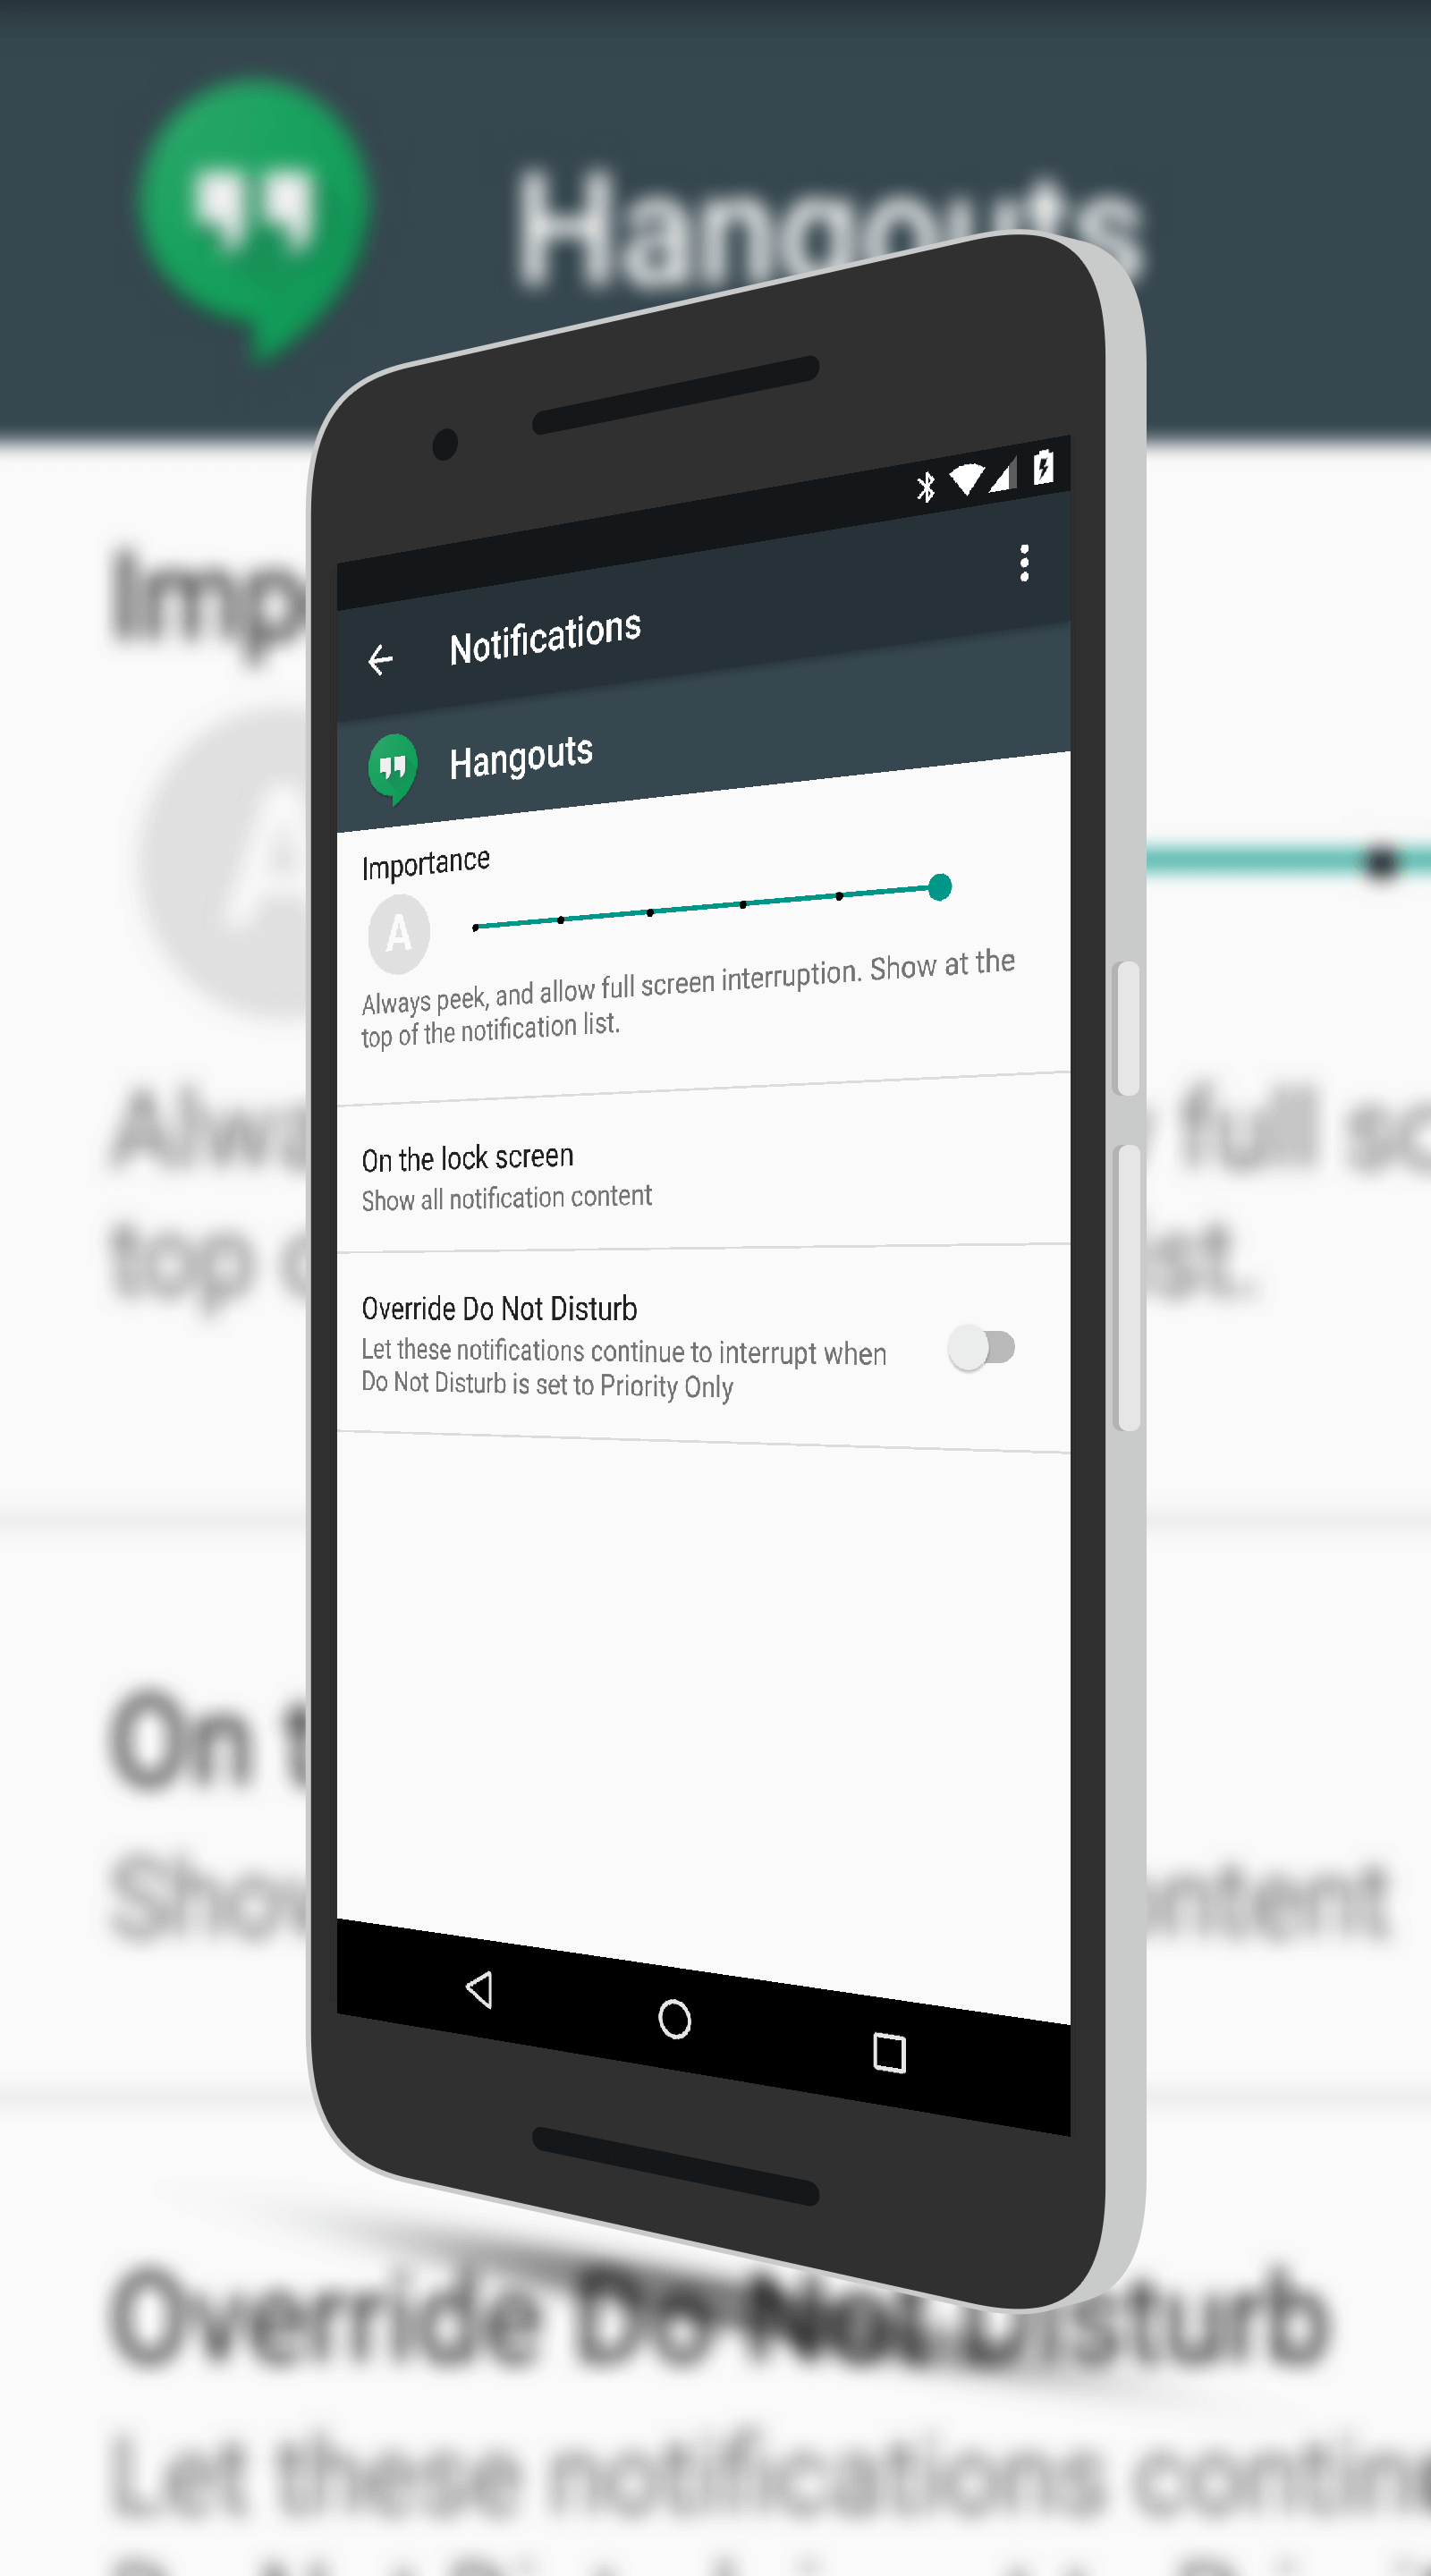
By default, every app on your phone is going to automatically be configured for the level of notifications that it would have had under Marshmallow. You, however, can control that now. Let’s say you always want Hangouts to interrupt anything you are doing on your device and always provide you high levels of notifications. Now you can give Hangouts a Level 5 access so it will always give you notifications no matter what is going on. To do this, you need to go to Apps in Settings then scroll down to the app you want to adjust. Tap it then tap on Permissions. You’ll note that there is a circle icon with an “A” in it. That means it is set to automatic. Tap it and then use the slider to adjust the level of notifications you want for that app. Once you are done, exit your way out and you are good-to-go.
For most users, 99% probably, adjusting these notifications isn’t a big need. Power users of particular apps for work or school however may want to make sure they always get a notification from a particular app. Also, if you have hundreds of apps, it is not really practical to change every single one of them. If you decide to enable this feature, be selective so you don’t over do it.
Be sure to check out all of the other How To’s here on the site for more tips & tricks on Android, Chrome OS and Windows.