While Chrome OS is rock solid as a platform, like any Operating System, there are times where things go wrong. The technical term is “poop”. Sometimes it just poops and you are stuck looking at a screen that tells you there is a problem with it. Fortunately Google has made it very easy to recover your Chromebook and Chrome OS through a Recovery drive. You can create these drives ahead of time which is a good idea so you have one with you in your back while you are traveling.
Creating a Recovery drive for your Chromebook is pretty easy but you have to make sure you follow the steps to assure you get the right build for your particular Chromebook. In this How To I’ll show you how to create a Recovery drive so you have it ready in case the worst happens.
The first thing you need to do is from you PC on Chrome or on your Chromebook is get the Chromebook Recovery Utility app for Chrome. You can download it from the Chrome Web Store and it is a free download. This is the utility that you will use to create your Recovery disk. If you are reading this How To from your Chromebook or your device is running just fine, I recommend installing and running the utility from your Chromebook. I’ll explain why in a couple of steps. If not, its no problem. You can easily create it from your PC but you will need to know one very key piece of information: Your exact device model number.
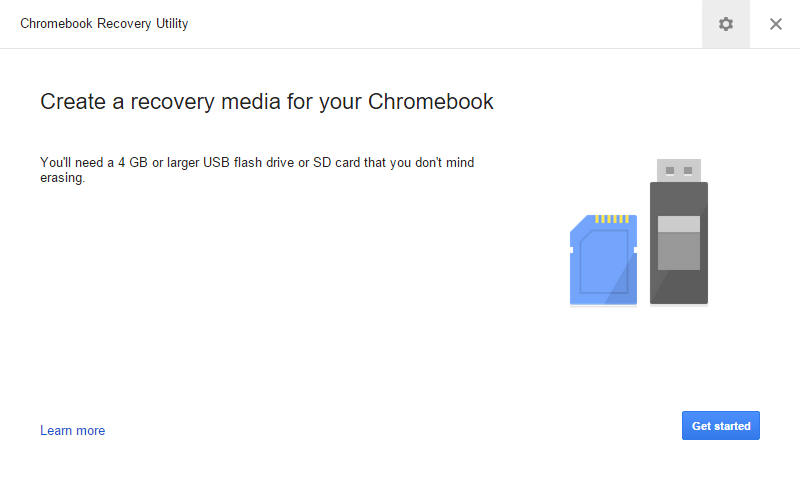
After you have installed the Chromebook Recover Utility, start it and you will follow the instructions on the wizard like applet. First, you will need to have an SD card or USB drive of at least 4GB
Step 1 on Creating A Chrome Recovery Drive
in size that you don’t mind formatting. With that in hand, connect it to your PC or Chromebook.
Step 2, you will need to know the model number of your Chromebook. If you are creating the drive from your Chromebook, at this step the model

Step 2 on Creating A Chrome Recovery Drive
number will be a hyperlink which when clicked will auto-populate the model number field for you. It is important that you have this information correct so you create a drive that will work for your particular Chromebook.
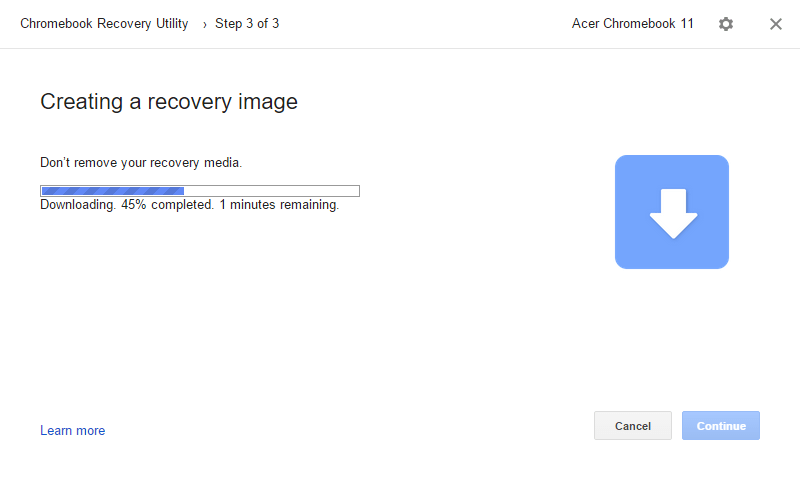
With the correct model number filled out, click continue and you will be prompted to select the USB drive you want to use to create the drive in Step 3. Again, you have to have one that is at least 4GB in size. If you have already inserted the USB or SD card into your Chromebook or PC, you should be able to use the drop down menu to select the drive you want to use. Once you have it selected, click Continue to move to Step 4 which is where you will be prompted to confirm that you know the USB or SD card you are using is about to be erased and the overall download size of the Chrome OS image you are about to install on that removable drive. Click Continue to move to Step 5.
Step 5 involves you sitting back and relaxing. At this point the Chromebook Recovery Utility will download the proper Chrome OS image for your device, install it on the USB or SD card and then verify that it is created correctly. The keys here are to make sure you do not remove the removable drive from your PC or Chromebook and that you have a solid internet connection so the
Step 5 on Creating A Chrome Recovery Drive
download can happen.
Once the Recovery drive is created, you will get confirmation in the utility. At this point it is safe to remove the USB or SD drive from your PC or Chromebook and shut down the utility. If you need to recover your Chromebook at this point, insert the SD card or USB drive into your Chromebook and power it up. You will then be walked through the recovery process. There isn’t much for you to do frankly as Chrome OS’ recovery mode will download the files from the USB or SD card and re-install the OS on your Chromebook. Once the recover is complete you will be prompted to
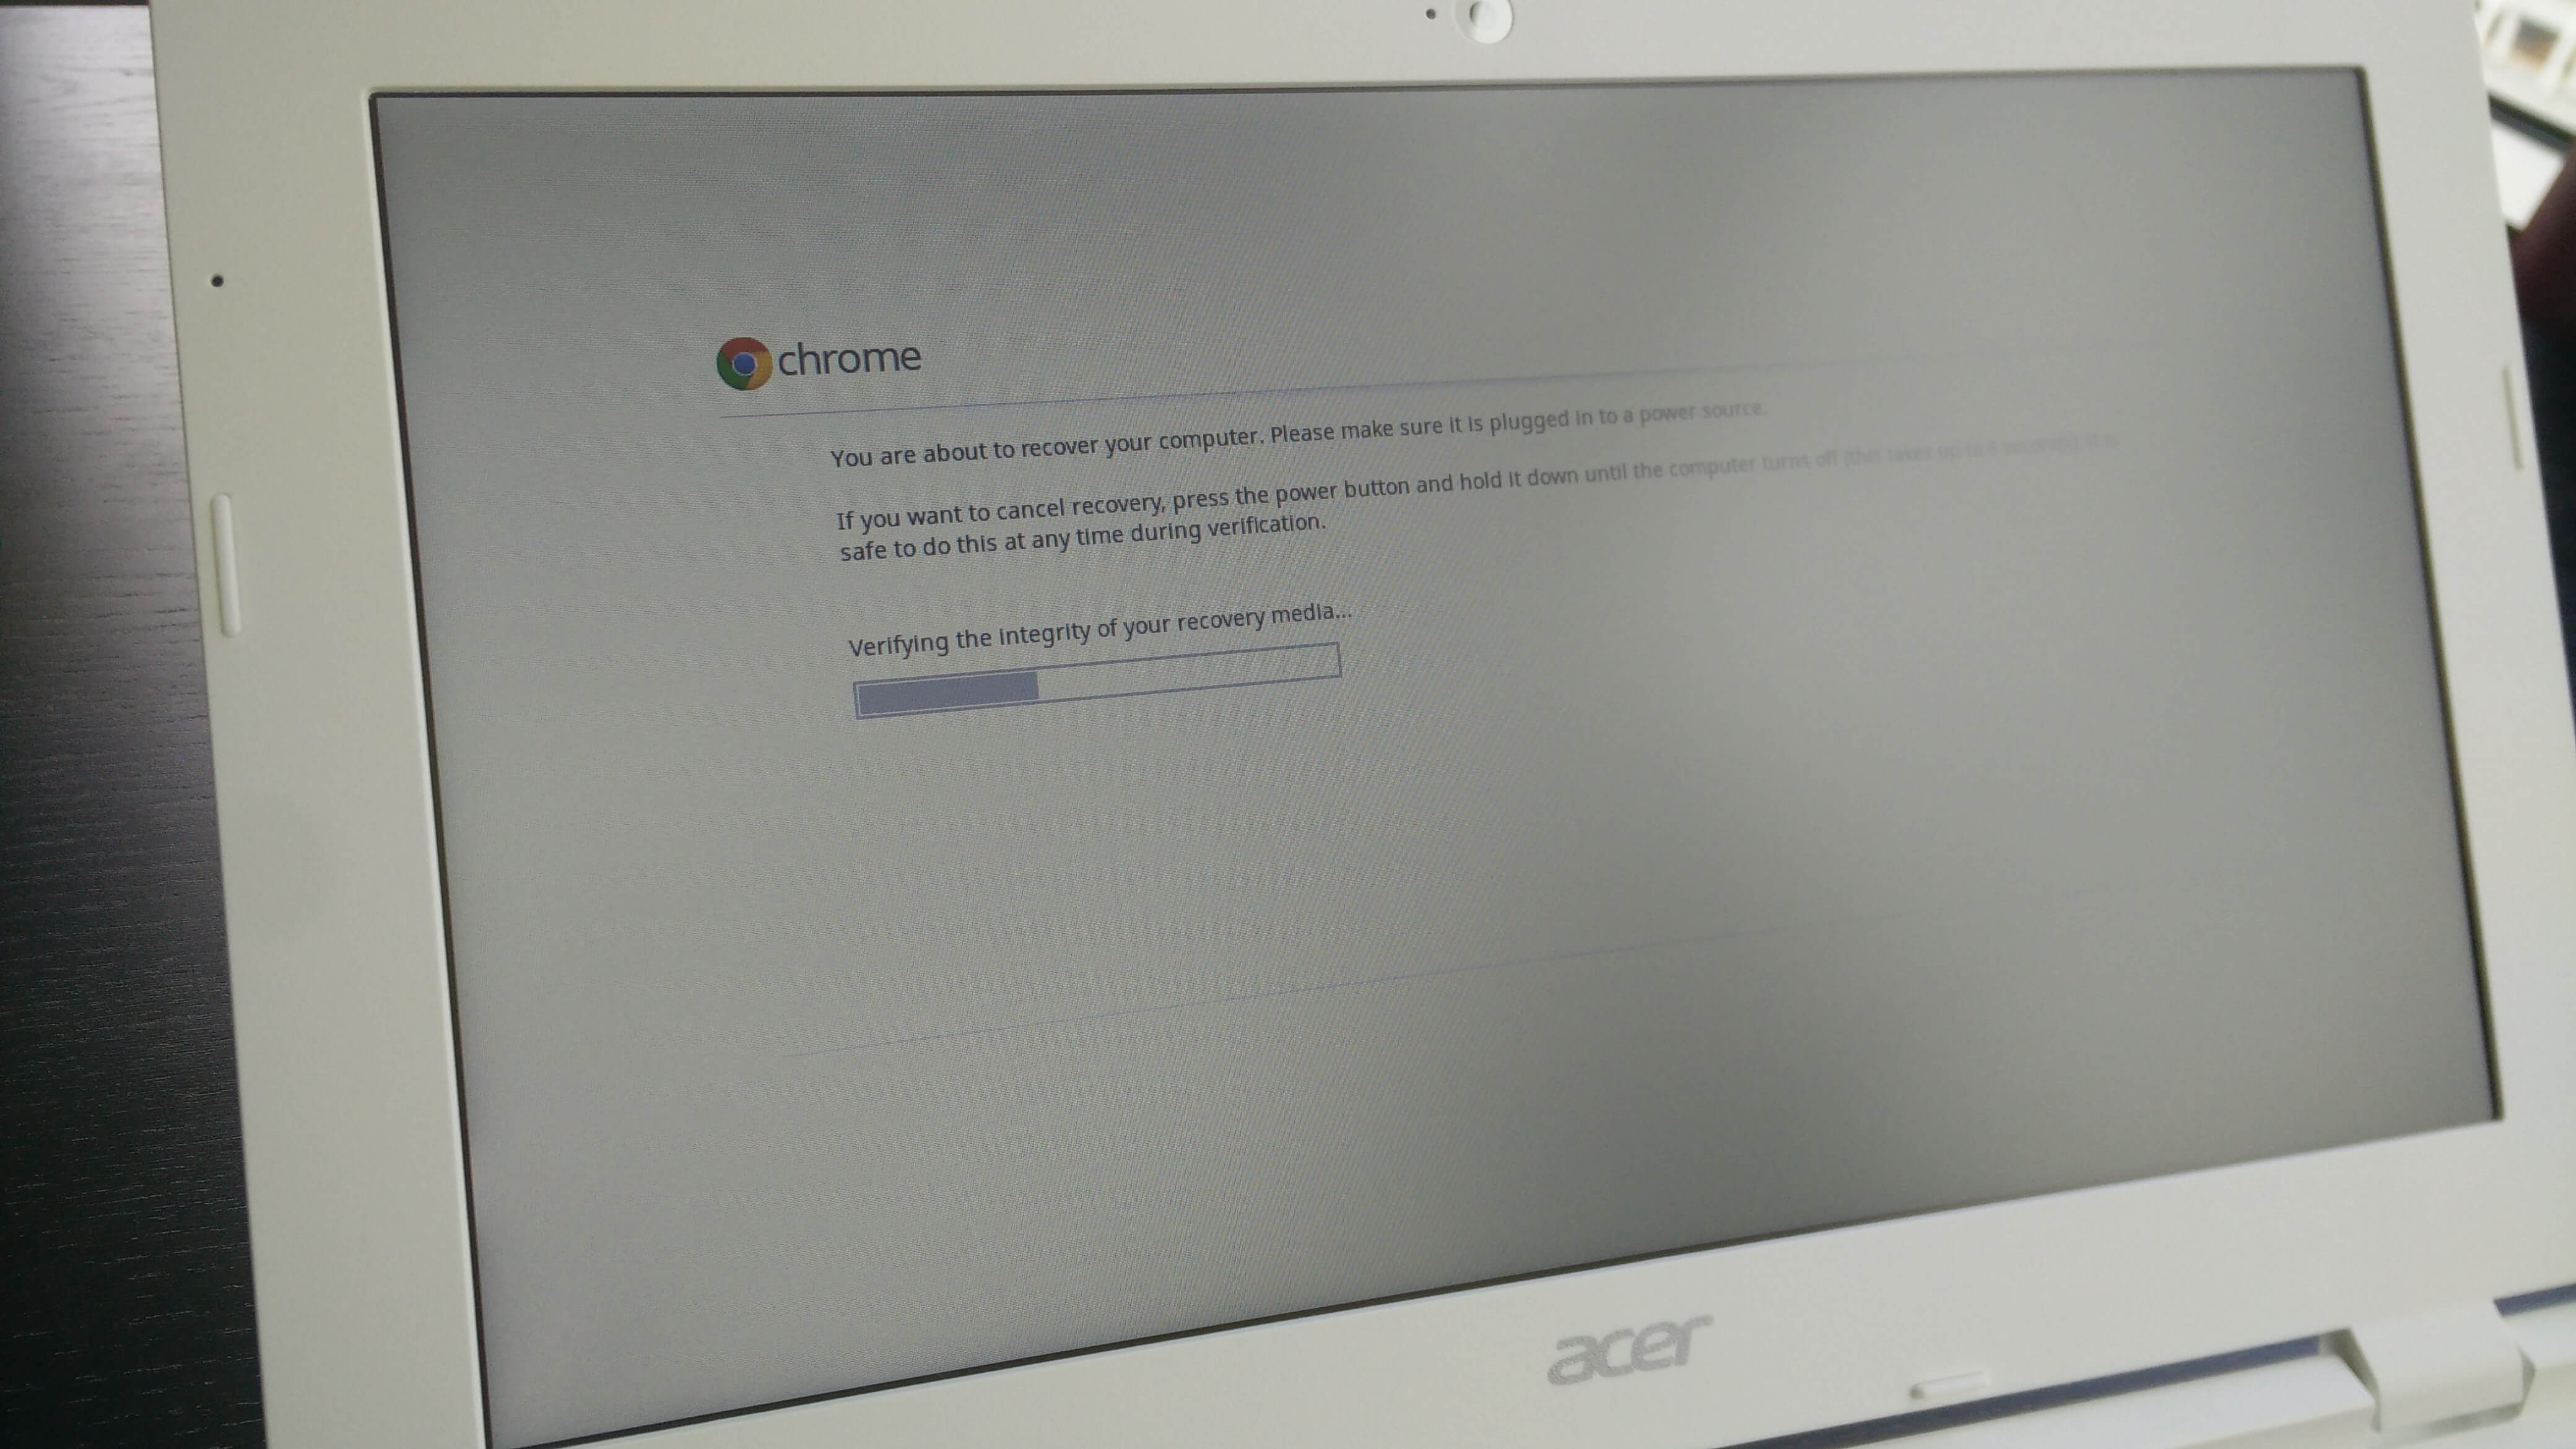
Recovering Chrome OS on a Chromebook
remove your recovery media and your Chromebook will restart. If you have synchronized your settings and apps with your Google account then you should be back up near where you left off in just a matter of minutes.